Wednesday, December 30, 2015

Yours and Mine

 Hello Everyone and welcome, how is everyone doing today? We have a few weddings coming up this year. I decided to make a card for one of them today. I love weddings and watching the new couple start out their lives together. The energy and excitement they share is felt by everyone in the room. Here is the card I made.

I will be entering this card in the following Challenges:
http://simplypapercraftsforalloccassions.blogspot.co.uk/2015/12/challenge-20.html
http://www.wordartwednesday.blogspot.com/
  • I started out with brown card stock and I used the wood grain embossing folder to add texture to the front of the card.
  • The sentiment is left over from a set I used for the shower card I made for the same couple.
  • I cut a thin strip of white card stock and adhered it to the card with heart shaped brads. This is the towel bar.
  • I used pink card stock and an embossing folder to create the towels. I cut the strip to 3/4" wide.
  • The brown across the bottom and the small flowers are great for detail. This was adhered to a pink A2 size card.
I will be buying a towel set for the gift and this card is perfect. I still have another card to do for the other wedding. I wonder what I will come up with for that one? Please make sure to subscribe to my blog before you leave. That way you won't miss my next card :) Thank you for stopping by and feel free to leave any comments or questions you might have in the box below. I love reading them. ~HUGZ~


Sunday, December 27, 2015

Beautiful.....

I'm so glad you had time to stop by today! I was thinking about my girl friend today. She is a single Mom and works full time while struggling with the day to day grind. I am SO proud of her. She is such a strong and confident woman with an ability to look at things in a positive up beat way. She starts Grad school in a couple weeks. I decided to make a card to let her know that she can do anything she sets her mind to. So here is the card I made for her.


  • I started out by cutting the A2 step card according to the instructions 

  • I used the "go get it girl" stamp set from Unity Stamp Company. She is colored in with Prisma Colored Pencils and fussy cut.
  • I adhered her to the card and used a small bird die for the center step. The Stickles makes them shimmer a little bit without taking away from the Sentiment. 
  • I added the Jems for detail.
 I sure hope you try this type of card. It is easy and fun. The side step card has a wow factor to it. Please make sure to leave your comments in the box below. It would be great if you could follow my blog, or subscribe by email. I look forward to you stopping by again and reading your comments. Have a blessed day.


Thursday, December 24, 2015

Relaxing with a Good Book

Merry Christmas Eve to all of those who Celebrate. Welcome! Today I was thinking about snowmen and how we used to have a yard full when our children were young.I would sit inside and watch them building the snowman's body while I read a good book. I would pause and take a peek at the progress and ggigle because they would be horsing around or having a snow ball fight. It's funny, everyone always said enjoy them while you can. I never understood what they were talking about until recently. My 3 kids are fully grown and have children of their own now and I tell them enjoy them while you can...I made this card in memory of those days.
I will be entering this in the following challenges:
http://outlawzchallenges.ning.com/group/prismaandothermediums/forum/topics/twisted-thursday-challenge-for-december-24-december-30-optional
http://simplypapercraftsforalloccassions.blogspot.co.uk/
http://www.simonsaysstampblog.com/mondaychallenge

  • I used my rectangle Dies to cut the window frame out of wood patterned paper. 
  • I used a hill Die from Lawn Fawn to form the hill the snowmen are on and the dot embossing folder for the sky.
  • I had the snowmen, the pine cones and the tree's in my stash from last year.
  • I stamped the "Part of the Story" stamp from Unity Stamp Company and I water colored her before fussy cutting her out.
  • I added the Baby its cold outside to the book cover just for fun.
  • After that was all done I added Stickles to the page to represent snow flakes.
I'm sure we all think about things in our past and it will bring a flood of feelings and emotion. I love sharing these events. They inspire me to craft and create. I find inspiration in almost everything I see. Try and look at things today and see if you can find something that is inspiring. It's out there just waiting for you to discover it. Have a blessed, safe and happy Holiday!


Tuesday, December 22, 2015

100 Challenges and counting

I have a card for you today in celebration to Canyoucaseit.com They are celebrating their 100th Challenge this week. Congratulations to them for their hard work and dedication to the blog and the challenges they put together each week. They have inspired us to continue to create and craft our little hearts out. Here is the card I made in honor of them reaching a huge milestone.

I will be entering this card in the following challenge:
http://canyoucaseit.com/?p=2652

CYCI#100
  • I used an A2 size card for this project. The gold and white diamond paper is from my stash.
  • The Viola and 100 are embossed with gold embossing powder, I put them on the slant for some detail.
  • The silver paper was cut using my rectangle die and I stamped Congratulations on white card stock and used silver embossing powder for some contrast and texture.
  • I added some gold sequins with clear Jems in the middle.
I am sending them my Congratulations and celebrating along with them. Their challenges have proved to be a lot of fun. I plan on continuing to enter my cards and play along with them in the future. I hope that I will be able to celebrate their 200th challenge with them also.

Monday, December 21, 2015

A gift from the heart


Welcome Everyone Today I have a CAS card with a Homespun Theme. I just love homespun gifts. Doesn't everybody? When I think of homespun I think of the days when my mom and I would bake and give Holiday treats as gifts, so I used that as my inspiration for this card. Here is what I made.

I will be entering this card in the following challenges:
http://simplylessismoore.blogspot.de/2015/12/weeks-255-256.html

We'd love you to display our banner


  • I started out with a standard A2 card in red. I used a corner punch on the cards corners in order to incorporate the circle of the pie.
  • I then used an A2 rectangle die to get the corners rounded on the water color paper.
  • The stamp is one I bought on sale a few months back from Whimsy Stamps. It's called "Sweet Sara."
  • I used water colors to color her in and it just seemed fitting to do a red, white and blue theme since she had an Apple pie in her hands.
  • The sentiments are from my stash.
The card definitely fits the "Less is More" theme and the pie just adds a warm feeling to the card. Please be sure to follow my blog and feel free to leave your blog address and any comments you might have in the box below. I would love to follow your blog and be inspired by what you do.

Santa Clause is Coming to Town!


Hello Everyone I'm so happy you stopped by today! I have been watching some of my favorite movies while I craft lately. When I saw a Holiday Movie card challenge on the Outlawz.ning.com I knew I had to enter a card. It's hard to pick just one Christmas show as my favorite. After thinking about it I decided to go with the favorite from when I was a child. Santa Clause is coming to town. I decided to try a step card. I've never done one and I thought it might be fun to do something different. Here's how the card turned out.


I will be entering this in the Outlawz Monday Greeting Challenge This week
http://outlawzchallenges.ning.com/group/monday-greetings/forum/topics/monday-greetings-challenge-inspired-by-a-holiday-movie-dec-21


  • I found a Digital page on Pintrest that I colored using Prisma Color Pencils. 
  • The step pattern was from a Pintrest card tutorial also. 
  • The snow flake paper was used as a base and then I used my scalloped Square Dies to make the Green plaid panels. 
  • When I was finished with everything I added Star Dust Stickles to random areas and added Jems in various locations. 

I just now realized that I didn't write down my measurements for the step card. I apologize for that. The step card was a lot of fun. I will be using it again in my future cards and I will remember to keep the measurements next time. Please remember to become a follower to this blog. I am posting on a regular basis and don't want you to miss anything. Feel free to leave me a comment in the boxes below. See you again soon ~HUGZ~

Friday, December 18, 2015

Who says Santa only Drives a Sleigh?

Wow! Today has been a busy one! I managed to get a card done even though I'm still not sure how...Haha I recently bought a few Grab bags from Unity Stamp Company and when I received them I was so excited to see what was in them. The image I used in my card was in one of the bags and I knew instantly what I was going to do with her. It being Christmas and all I just couldn't pass up making this fun card. Here is my card:

I plan on using this card in the following challenges:
http://canyoucaseit.com/?p=2650
http://www.simonsaysstampblog.com/wednesdaychallenge/
http://www.theunitystampco-challenge.blogspot.com/
http://brownsugarchallenge.blogspot.com/2015/12/challenge-177-anything-goes.html#

  • I started out stamping Shera {Fashionista} on water color paper. I used my Tim Holtz Distress Inks to do the water coloring
  • When she was dry I picked out the background paper and cut that to A2 size. I trimmed her down  to 3 3/4" x 5". 
  • I used a corner punch on the top two corners, tied my string around her then adhered her so she was even with the bottom of the center of the card.
  • I used enamel dots  for detail and added the banner tag I bought from Joann's earlier in the week.
  • The inside reads " Who says Santa only drives a Sleigh?"
I just thought that this was cute and my playful side just couldn't resist. I was so excited to see her in the grab bag. what a treat! I bet you have surprises like that too. It just sets the mood for the week! I hope you all have a blessed day!

Thursday, December 17, 2015

Let Your Heart Take Flight

Welcome Everyone! I am so happy that you have stopped by today. As Christmas is only 8 days away I am sure all of you are very busy trying to do last minute shopping, wrapping and Holiday Parties. It's now more then any other time of the year that you need to schedule in some crafting each day. Crafting lowers your blood pressure, your stress level and relax's you. Every minute counts even if its only ten minutes, so happy crafting friends! I made a card today for someone very special to me, my Sister. She is in a new relationship and very happy. I just wanted her to know I'm happy for her. Here's the card:
I plan on using this card in the following Challenges:
http://outlawzchallenges.ning.com/group/prismaandothermediums/forum/topics/twisted-thursday-challenge-for-december-17-23-optional-twist


  • I used the A2 size rectangle die to make the base for my card.
  • I started out with a piece of A2 size white card stock and used my Tim Holtz Distress Mini Inks to make my background. I used Picked Raspberries, Shaded Lilac, Salty Ocean and Festive berries.
  • The Purple frame was made using the two largest A2 rectangle dies.
  • The Bird cages are from The Crafter's Work Shop Stencil. I used a Metallic Gel Pen to trace the stencil and Tim Holtz Distress Marker's for the birds.
  • The Sentiment is from Unity Stamp Company. The WOW embossing powder really pops on the velum. I used Festive Berries Distress Ink behind the word "Heart" to give it a bit of detail.
  • I added heart shape sequins scattered about and then tied my floss at the score of the card.
This was such a fun card to make. I love using the Distress Inks like this. It always amazes me how nice it looks when your done rubbing all of the colors around the paper. I look forward to reading your comments so please remember to leave your comments, idea's and questions below. I hope you have a blessed day.

The Outlawz Twisted Thursday Challenge - Girly, Girly

Yay! I'm back as a Guest designer with the Outlawz Twisted Thursday Challenge. The theme this week is Girly, Girly and Besties is our sponsor again this week. A big Thank you to them! The image they provided this week is adorable. I hope that you stop by and check out the challenge at http://outlawzchallenges.ning.com/group/prismaandothermediums The challenges are a lot of fun and the DT's are amazing! Here is our sponsor:


Here is the card I've done for this Challenge:

She is so cute and fun to color. Since its Girly, Girly I used a lots of pinks and greens to color her in.
I used Prisma soft core color pencils to color the image.
She is dazzaling and for that reason I added stickles to the white fluffy area's of her outfit and to the twinkle in her eyes.
I added some flowers and a bow for embellishments to finish off the card.
The sentiment is the Thoughts for the Day sentiment set from Inkadinkado.

Please remember to leave your comments below. I love reading them and enjoy all of your thoughts. I hope that your having a fantastic day. ~Hugz~ 

Tuesday, December 15, 2015

Snow flakes and ribbons....

Today I have a quick and easy card for you. This is a nice card to do if your in a pinch for time. I'm sure everybody has those days were they just can't get caught up and you have very little time to craft. I find that's when you need to craft the most. It helps relieve the stress and relaxes you. I find that it is these times were you need quick and simple projects. Something you don't have to give a lot of thought to and still feels rewarding when your done. Here's the card:


I will be entering this card in the following challenges:
http://canyoucaseit.com/?p=2650
http://outlawzchallenges.ning.com/group/wednesday-sketch/forum/topics/wednesday-sketch-challenge-december-16

  • I started out knowing I wanted red and white as my two colors so I went with the red as my base color and white for embellishments.
  • I used 2 different style embossing strips and ran them through my big kick. I chose to use the musical notes one in the middle and make two strips with the other.
  • I cut one end to make them look like a banner edge, glued them down and tied a silver ribbon around the middle of the card.
  • The snow flakes are Dies I purchased from Simon Says Stamps. I used a small one in the middle of the three and then glued a red Jem on them.
  • I added the Sentiment and the card is done.
I have not been feeling real well and my time in the craft room has been slightly effected. I still needed my craft time and this  quick project was just what the craft doctor ordered. As always I appreciate that you stopped by. Please remember to follow my blog and Please leave me a comment on what you think of quick projects like this. I would enjoy seeing your work so leave your blog address in the box below and I will be by to visit you soon. Thank you ~HUGZ~

Monday, December 14, 2015

Don't open until Christmas!

Hi everyone, Thanks for stopping by and for all your wonderful comments. I'm honored to have you here and I truly appreciate each of you more than you know! My Christmas Ornament Party went well. We all had a lot of fun. The appetizers were amazing and the Ornament exchange was a hoot! What did you do last weekend? I barely had time to craft. Today is a great day for crafting. It's raining, cold and blustery here in Minnesota. The image I used today is similar to an image I did last week. I purchased this stamp from Unity Stamp Company. Its a Phyllis Harris illustration you can see her work here http://phyllisharrisdesigns.com She is an amazing artist. Here is  my card:


I plan on using this card in the following challenges:
http://outlawzchallenges.ning.com/group/saturday-paper-a-la-mode/forum
http://canyoucaseit.com/
http://www.simonsaysstampblog.com/mondaychallenge/
http://www.wordartwednesday.blogspot.com/2015/12/challenge-213-anything-goes.html
http://www.theunitystampco-challenge.blogspot.com/
http://addictedtostamps-challenge.blogspot.de/
http://simplypapercraftsforalloccassions.blogspot.co.uk/2015/12/challenge-20.html
  • I started with the ...my favorite friend stamp from Unity Stamp Company. I chose to use water color paints to finish the image.
  • The Dies cut was made with a label die. I cut part of the image with the die and then moved the die to the position I wanted and finished the die cut. Doing this allowed me to choose the size and shape of image on the card.
  • The banner and "don't open until Christmas are pieces left over from last years stash.
The card was quick and easy. Dies are very versatile. If you run a die part way through your big kick, or other brand machine, you can move the die and cut a completely different shape. you can even cut using two dies. Let your imagination run with it and try different things with them. You will be shocked at all the variations you can do. Add your link in the comment boxes beloow so I can come see what you make. 

Jingle Bells....


Hi everybody and welcome to my blog. Today I found myself staring at my card stock and wondering how I was going to do a card with a musical theme. I don't know why I was so stumped....card makers block??? Haha Once I got all of my Holiday things together I started to notice a theme. I decided to go with it. I found that the card came together rather quickly after that. I chose to go with one of my favorite Holiday songs "Jingle Bell's." Here is my card:


 I plan to enter this card in the following challenge:
http://outlawzchallenges.ning.com/group/monday-greetings/forum/topics/monday-greetings-challenge-music-on-your-card-dec-14-gcc121415
http://www.wordartwednesday.blogspot.com/2015/12/challenge-213-anything-goes.html


I first found all of the things that I had that related to Jingle Bell's. Then I cut my sheet music pieces and before I knew it the card was finished. I had Bell brads, tiny Bell's,and all of the Jingle Bell chip board pieces in my supplies. All I had to do was start adhering my items and wha la...finished. Taking part in challenges is a lot of fun and it makes you think outside your usual way of doing things. I love that part of it. Do you post your cards in challenges? Which ones? Please leave a link or address of your favorite challenges in the box below. I love trying other challenges and some of my visitors may find the links useful, too.

Friday, December 11, 2015

Puppies for Christmas!

It's a GREAT day for crafting. It's gloomy and rainy out and I can't think of a better way to spend my day than in my craft room. I sometimes will wake up in the night with a card idea and this was one of them. It's funny, I started out in a completely different direction with the layout and patterns I was going to use. Have you ever thought something would look great but when you start to piece it together it just isn't working? That's when I remembered this layout idea and the card took off. Some of my best cards are things that came to me in the middle of the night. I hope I'm not the only person that wakes up and jots down a layout for a card... I used one of my new stamps from Unity Stamp Company it's called "...Life is Better." I'm in love with this stamp and I hope you will like it, too. Here's the card:

I plan on entering this in the following Challenge:
http://www.theunitystampco-challenge.blogspot.com/
http://www.simonsaysstampblog.com/mondaychallenge/
http://alwaysplayingwithpaper.blogspot.ca/2015/12/sugarpea-designs-sketch-challenge-week.html#comment-form
http://outlawzchallenges.ning.com/group/prismaandothermediums/forum/topics/twisted-thursday-challenge-for-december-10-16-optional-twist
http://www.wordartwednesday.blogspot.com/2015/12/challenge-213-anything-goes.html
  • I started out with brown card stock cut to A2 size.
  • I painted the image with water colors and then I used a Sizzix Scalloped Square Die set to cut the image.
  • She has two layers under her so that I could get some dimension to the card but still be able to mail the card without extra postage.
  • The ribbon is cut and glued down with a bow added to the top of the ribbons for a little pop of color and dimension.
  • The sentiment is from the Old Traditions stamp set by Unity Stamp Company. 
  • Next I glued on some buttons and Jems and used a puppy paw print on the sentiment banner.
Sometimes it's best to let the card decide where it is taking you rather than force it. It seems like they always turn out better that way. Please remember to leave me your comments below and if you have a blog please add your address so I can follow you and we can inspire each other. Thank you for visiting today. ~HUGZ~


Thursday, December 10, 2015

A Chicks Birthday

Welcome to my Blog Everyone! Today I'm doing my last minute posts and making a few cards. Every year my Family and Friends have a Ornament Exchange Party. It started out as a cookie exchange but that became overwhelming with so many women participating. It's my year to Host the party this coming Saturday so I am feeling a little stressed getting everything ready. Do you have Holiday events within you Circle each year? I know some people have Ugly Sweater Parties. That sounds like a lot of fun! Well, I made a birthday card today and stepped away from the Holiday Cards for a bit of a change. Here is the card I've made for today.

I plan on entering this card in the following challenge:
http://outlawzchallenges.ning.com/group/saturday-paper-a-la-mode/forum/topics/paper-ala-mode-12-5-12-11-15-birthdays
http://addictedtostamps-challenge.blogspot.de/
http://www.theunitystampco-challenge.blogspot.com/

I started out using the Basic A Rectangle Die set from Spellbinders. I just bought this set and couldn't wait to use it :)
I used a Embossing folder for the streamers on the Green card stock. The yellow flower brads are from my stock.
The Birthday Chick is from Unity Stamp Company. I used a basic water color paint set to paint the image. I couldn't resist adding a few Jems to the picture.
The sentiment is from the Thinking of You Stamp set by Art-C.

This was a quick and easy card to make but it looks great and anyone would be happy to receive it. Its always nice to have something you can make at the last minute for the events you remember at the last minute. I hope everyone enjoyed the card today. Please remember to subscribe to my blog and please leave a comment in the box below. I love to read them and learn what you want to see on the blog. Have a blessed day.

Outlawz Twisted Thursday Challenge - Christmas

Hello Everyone! I'm so excited to be here as a Guest Designer with the Outlawz Twisted Thursday Challenge. This weeks Theme is Christmas. Is there anything better?? With the Holiday so close and everybody finishing up their cards its a perfect time to post them and share your inspiration and talents! Our Sponsor this week is the lovely Besties! Yay!!


I had so much fun designing the card this week. It is the first time I've worked with Digital images. The fact that the image is precious helped a lot. Well, Here is the card I designed for this challenge.


I started with a 4" x 6" piece of water color paper. I decided to use Prisma Premiere Color Pencils to color her (when I tried to do water coloring the ink smeared).
I used the Tag Die from Sizzix to cut her out and started my layout on a 5" x 7" card.
I adhered red card stock down and then 6 1/2" x  3 1/4" snowflake paper was added to the right side of the card.
I adhered her to a green piece of card stock and cut it down to 3 1/4" x 5 1/2". Once she was trimmed I adhered her to the left side of the card and added the gold cord.
The sequins where added for a touch of detail.
I decided to use the "Joy to the World" button as a yo-yo. I tied a piece of thread in a small bow and glued that to her finger.

This card had its challenges but I enjoyed learning how to work with Digi's and it has opened a new  window of opportunities for me. The Digital World of Stamps are SO much more affordable and you can do so many things with them. I will be exploring this a lot more. Thank you for visiting my blog today and Please remember to leave me a comment in the box below. I love reading the comments and making new friends! Have a blessed day. Jules


Tuesday, December 8, 2015

Birthday Butterflies

I have several craft supply sights that I check on a regular basis. I'm always looking at what is on sale, clearance or on a special deal. I'm sure I'm not alone and many of us do this. Every once in a while you come across a sale that knocks your socks off. I found several deals on Whimsystamps.com a couple of weeks ago. Here is one of the stamps I found for under $2! It's just precious.

The stamp is called "Butterfly Friends."
I used my water color paints to color the image.
Once it was dry I used stickles on the Butterflies and the center of the flowers.
The image is adhered to a background done with a Darice "Clouds" embossing folder.
I used a make-up sponge and white pigment ink to soften the blue paper around the clouds.
The ribbon is from my stock. I added a butterfly button and the heart brad for detail.

This image might just become one of my favorites. My Granddaughter has her 2nd Birthday coming up this month. She LOVES Butterflies and I think I'm going to give this card to her. I tried to keep the embelishments simple so there wasn't a chocking hazard... I think she will love this card.

Monday, December 7, 2015

It's Not What We Have In Life....

Welcome Visitors, Followers, Family, Friends and Crafters. Its such an honor to have you here visiting with me. I enjoy sharing my cards and inspiring others. If you have a blog that you would like us to visit please leave the address in the comment box below. I enjoy visiting others and seeing what all of your are doing is so much fun! Today I have a card that was a bit of a challenge at first. I had to step out of my box and use 3 patterns. I love patterns but I don't use many at one time. I'm always afraid of putting to much on the card and then the meaning of the card gets lost in all the clutter. I did this card for the Outlawz Monday Challenge, Here is the address
http://outlawzchallenges.ning.com/group/monday-greetings/forum/topics/monday-greetings-challenge-december-7th-3-patterned-papers-1-die
I encourage you to check them out. The group is amazing. The people are super friendly and I just love playing along with them. I'm glad I did this card to my surprise it wasn't as hard as I thought it would be! Here is the card :)


I started out with the striped paper as my card base.
I cut the tan paper 3/4" smaller and adhered it to my card.
The stamp is "Going to be Owl-right" stamp from Unity Stamp Company. 
I water colored him using Tim Holtz Distress Markers.
The Die is a Tag Die from Sizzix, 
I used brown brads to secure him to the leaf paper.
For some detail I added Stickles on the hearts and the owls eyes.

At first I was so overwhelmed thinking about using 3 designs but once I chose my patterns it all just fell into place. Now I know I can do it and the card won't be to busy or cluttered. It's good to step out of your comfort zone and try something different. That's why I enjoy the challenges so much. Thank you again for stopping by. Don't forget to leave your blog addresses in the comment box below so I can visit you! ~HUGZ~

Saturday, December 5, 2015

Peace for the Holiday's

Do you set a Holiday tree up at this time of year? For most of us its a Holiday Tradition. Do you have
yours set-up yet? I put ours up last Monday. When my Children still lived at home it was an all day event. We used to start our day with brunch and end the day when the tree was finished and I read them "The Night Before Christmas." This year it took me most the day and it seemed harder for me then in years passed. I'm glad its up and I get a sense of Peace looking at it and thinking about all it stands for. I made a card with this in mind today.

  • I started with a 4" x 5 1/4" of white card stock, a Darice embossing folder and Evergreen Powder Puff Chalk Ink.
  • I rubbed the chalk ink on the flat side of the embossing folder and ran it through my Big Kick.
  • I decorated the tree with Jems and sequins.
  • I used WOW white embossing powder on velum for the sentiment. I wrapped the velum around the card front and adhered it in the back.
  • I then cut green card stock for my 4 1/3" x 5 1/2" card and adhered the embossed paper to it.
  • I finished the card by adding some string to the fold of the card and a few Jems to the velum
This was a quick and easy card to make. You could make this when you are in a pinch for time and need a quick card. It looks like you spent a lot of time on it :) I make cards on the go at times and this always works out so nice. I thank you for stopping today. Don't forget to follow my blog and please leave a comment before you leave. I appreciate them so much!

Friday, December 4, 2015

Happy Christmas Little Star

Today I'm showing you a card I am entering in the Outlawz Progressive Freebie Challenge located at:

http://outlawzchallenges.ning.com/group/freebie-progressive-challenge/forum/topics/progressive-freebie-challenge-december-1-2015

 I did something completely different with this card. A good friend and fellow crafter actually gave this idea to me. She did a tutorial on her blog on a screen card. Her card is gorgeous and I couldn't resist trying her technique. Here is her blog address and great tutorial:

http://lilartsywoman.blogspot.com/2015/12/fridayfree-for-all.html

I encourage you to stop by her blog today. She has gathered several blog addresses that are offering free Digi's this month. Make sure to follow her blog. She is extremely talented and I gaurantee you will be inspired by her creations. Here is my card today.


 I started with a piece of card stock 5 1/2" x 12".
I scored the card stock at 3", 6" and 9".
I used a Tag Die to form the bottom of this card.
The tree's are from the Cricut Sampler Cartridge.
I used Simon Says Hill Die to form the snow hills.
The sentiment tag is from the same Tag Die set I used for the bottom of the card.
I created the sentient by taking the words from several sentiments sets.
I used Prisma color pencils on the Digi provided from All Dressed Up at https://www.etsy.com/shop/alldressedupstamps
This was a lot of fun. I never thought of using my Die Sets this way. I will make sure to do this again. Thank you for taking time from your busy schedules to stop by. I am so glad your here. Have a safe and wonderful Friday everyone.

Thursday, December 3, 2015

Cheers!

Do you go out for New Years? I have always wanted to go out and celebrate but I usually can't afford to after buying all the Christmas gifts and things. Going out and celebrating New Year's is on my Bucket list. I have to giggle at this because I have a hard enough time staying up until 10 pm most days.

                                            ..CYCI#97
I made a card today for the Can You Case it Challenge 97. 


This is my card:

  • I cut my red card stock and made a 5" x 7" card and then adhered a 4 3/4" x 6 3/4" black card stock to the card base.
  • I used the Something to Celebrate Cricut cartridge to cut the glasses and adhered them to the front of the card. I cut two sets one with silver glitter paper the other with gold glitter paper.
  • I used an alphabet stamp set to create the word "CHEERS." I used Red Tinsel embossing powder. I had to repeat the embossing three times in order for it to show up on the black card stock.
The card is done in a CAS format and I kept it as a sing;e layer so that it will hold up in the mail. This card will be sent to a family member. I didn't want to have part of the card fall off during the mailing process. I hope you enjoyed the card today. Please remember to leave your comment in the box below. ~HUGZ~

Spreading the Joy

Hello Everyone! I'm so glad you have stopped by. How are you doing? Have you found time to craft your items for the Holiday's yet? You can always tell the Holidays are just around the corner by how much heavier the traffic is. I live in a small town and even here the traffic flow has more then doubled. I did a card today with a Holiday theme. I have seen a lot of people out buying their trees and traveling home with them the past few days and it motivated me to make this card. The stamp set I'm using today is "Old Traditions" from Unity Stamp Company.

I plan on using this card in the following Challenges:
http://addictedtostamps-challenge.blogspot.de/
http://www.theunitystampco-challenge.blogspot.com/
http://outlawzchallenges.ning.com/group/prismaandothermediums/forum/topics/twisted-thursday-challenge-for-december-3-9-optional-twist-a

I had to stamp the truck and fussy cut it out so I could use it as a mask. I placed the mask where I planned on putting the truck on my water color paper.
Now I started on the Birch tree background.
Once I had the background finished I stamped the truck onto my paper and did the water coloring on it.
The sentiment came with the stamp set and I used green card stock to make the flag. The flag has foam tape behind it for added dimension.
I added some stickles for falling snowflakes fo the final touch.
I used Tim Holtz Distress Ink To Do the background. Here is a list of the colors I used.

For the sky:
Chipped Sapphire
Salty Ocean
Dusty Concord

For the tree's and shadows:
Pumice Stone
Hickory smoke

For the road:
Tea Dye
Vintage Photo
Walnut Stain

The sun:
Scattered straw

For the water coloring I used Tim Hotlz Distress Markers. Here is a list of the colors I used.

The Tree:
Pine needles
Peeled Paint
Mowed Lawn

The Truck:
Blueprint Sketch
Faded Jeans
Tumbled Glass
Weathered Wood

The Tires:
Pumice Stone 
Hickory Smoke
Black

The Ribbon:
Barn Door


I know it seems like a lot of work to make this card but it wasn't. The background with the trees is very easy to do and water coloring the rest is just plain fun! I'm happy with the end results and I hope you enjoyed this card, too. Please remember to leave a comment in the box below letting me know what you think about the card. Also, I'm here if you have any questions. I'm more than happy to help. ~HUGZ~

Wednesday, December 2, 2015

Older than Dirt

Welcome Followers, Family and Friends. I'm so happy that all of you stopped by. I'm getting ready for my future Sister-in-Law's birthday today. Her birthday is Saturday and I made a card that is fun and has a touch of humor to it. She is a lot of fun and we can always count on her to make sure the Family gets together each week. Even if its just for Sunday football. I'm sure this weekend we will be celebrating her. I used the "Nancy Girl" stamp from Unity Stamp Company to make her card.


I plan on enter this card in the following Challenges:
http://outlawzchallenges.ning.com/group/monday-greetings/forum/topics/monday-greetings-challenge-november-30th-anything-goes
http://www.theunitystampco-challenge.blogspot.com/

  • I started out with a 5" x 7" card base and cut my Denim print paper 4 3/4" x 6 3/4".
  • I used a round corner punch on the card base and the denim print paper. I adhered the paper to the card front.
  • The "Older than Dirt" is part of the LOL Stamps set. After I stamped it on white card stock I cut it out and adhered it to the top of the card.
  • I stamped the "Nancy Girl" Stamp on water color card stock and water colored her in using Tim Holtz Distress Markers.
  • Once she was dry I was able to use the corner punch and run Barn Door Ink around the edges.
  • I set her to the right of the card and added a bottle to rest on her palm.
  • The "Keep Calm" stamp is also part of the LOL set. It was stamped onto the paper and I used WOW white embossing powder to make it pop.
  • I used the regal Dies set from sizzix to make the tag. The background is white card stock with Barn Door Distress Ink.
  • On the inside of the card I used another sentient from the LOL set. It says "Happy Birthday(I'm still Younger than You)." I just love the humor of this set!
  • To finish the card off I added Jems in random spots throughout the card.
Do you have Family or Friends with Birthdays this month? December Birthdays are sometimes forgotten because of the Holidays. I try to make the Birthdays special in small ways. A handmade card is a wonderful way to let them know you love them and they are special on their Birthday. I'm looking forward to reading your comments in the boxes below! Please subscribe to my Blog. I promise you won't be disappointed! Thank you for stopping and have a Fantabulous day!


Tuesday, December 1, 2015

Joy to the World!

Hello everybody, I'm so excited about the up coming week and the cards I have for you. I hope everyone had a Great Thanksgiving with their Families. I had a fantastic weekend with family and friends. I even managed to do some Cyber Monday shopping...for more card supplies of course. Yay!
Today I have a simple card that doesn't need a lot of supplies to make. Here's my card.

I will be using this card in the following posts:
http://outlawzchallenges.ning.com/group/monday-greetings/forum/topics/monday-greetings-challenge-november-30th-anything-goes


  • To do this card I used The Regal Label Set from Sizzix. You can use any Die set to do this technique.
  • I cut the base of my card 5 1/4" x 10" and then I scored it at 5" to form the card base.
  • Next I took the largest Die and placed it on top of the card base. This is where you have to be careful. You need to leave the Die hang of the folded card edge so as not to cut the entire fold. See the picture below for an example.


  • Once, I had the base made I moved onto cutting the rest of the pieces with the same Die set and adhered them to the front of the card.
  • The sentiment is "Joy to the World" stamp from Unity Stamp Company. I used Red Tinsel heat embossing powder from Recollections for the sentiment. 
  • I didn't need to add much for detail. The three sequins is all it needed and the card is done.


I really enjoyed doing this card. The stamp and red tinsel embossing was my inspiration. The embossing powder is so pretty and really makes a statement all on its own. I would love to see how you use some of your dies sets to make different shape cards. Leave me a link or address so I can visit your blogs and see what you have been making. Thank you so much for stopping by. I truly appreciate all of your comments so feel free to let me know what you think. ~HUGZ~

Saturday, November 28, 2015

Do You Need A Tissue?

Hello Everyone! I hope this finds everyone safe, happy and healthy after the craziness of Black Friday. I wonder is America the only Country that has Black Friday Sales Events? With the Cold and Flu Season upon us I thought I might need to get a few cards ready. I came across a Get Well card and thought it was SO cute I had to make one and share it with you here is the address from the inspiration card. http://confessionsofapaperholic.blogspot.com/2013/10/jas-challenge-and-unity-friends-with.html I encourage you to stop by her blog and see what she has been up to. She is extremely talented. I got so excited about this card. I had to make it right away.

I will be entering this card in the following challenge
http://outlawzchallenges.ning.com/group/prismaandothermediums/forum/topics/twisted-thursday-challenge-for-nov-26-dec-2-2015-is-anything-goes


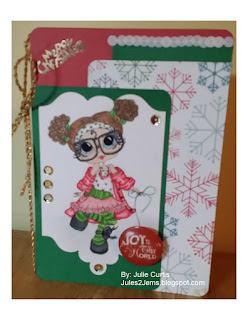
I embossed my 4" x 5 1/4" card stock with the "Cloud" embossing folder by Darice. 
I added some color using Broken China Tim Holtz Distress Ink and a mini blender.
I used the Something to Celebrate Cricut Cartridge to cut out a cloud at the #3 size setting and then used the same ink and method to add color to the cloud.
The Sentiment is from a Stampendous set. I used Blueberry embossing powder from Sparkle N Sprinkle and my heat gun to give the front of the card more detail.
The front of the card was adhered to a bottom opening A2 card (4 1/4" x 5 1/2")
The tissue box is made from a piece of paper 3" x 5". You need to score it along the 5" side at 1", 
2 1/2", and 3 1/2". 
I used a small oval template by Fiskars to cut my opening for the top of the tissue box. You need to make this cut between the 1" and 2 1/2" score marks.
You will glue the 1" side to the top of the inside of your card and the 3 1/2" side to the bottom of the inside of your card. 
I folded the tissue accordion style and slid it in from the side with a tip popping out the top of the tissue box opening.
The Get Well Sentiment is from the Hero Arts Thinking of you set.

Isn't this just adorable? I can't wait to give this card to a loved one when they are sick. I hope you get a chance to make a card like this. It's not a card the recipient can say they have ever received before. Please take a minute and leave a comment in the box below. I love reading them! If you have any questions feel free to ask. I'm more than happy to help. Have a Great weekend!

Thursday, November 26, 2015

The story of the Turkey....

As I am sitting here this Thanksgiving Day I can't help but reminisce of the past and all the Thanksgiving Days as a child. We would visit all of the important people in our lives and celebrate them. Here I am an adult with three grown children, 3 in-law children, 7 grandchildren and friends that stick with me through thick and thin. Well, the Thankfulness I feel is over flowing. I may not be in the best of health but what more can someone ask for? Do you feel the thankfulness at this time of year? I know that other countries don't have the same Holiday's but Christmas is around the corner and these same feelings will flood over me then, too. I was so happy that one of our sister-in-laws decided to host the Thanksgiving meal for the Family today. I made her a card with one of the new stamps I bought. I designed this card for her.


This card will be entered in:

Outlawz Twisted Thursday challenge
http://outlawzchallenges.ning.com/group/prismaandothermediums/forum/topics/twisted-thursday-challenge-for-nov-26-dec-2-2015-is-anything-goes

The Addicted To Stamps and More Make Your Mark Challenge
http://addictedtostamps-challenge.blogspot.de/2015/11/challenge-172-make-your-mark-winners.html

http://www.simonsaysstampblog.com/wednesdaychallenge/
  • So for today's card I started out with a 4" x 5 1/4" piece of water color paper and the Part of the Story Stamp from Unity Stamp Company. Once I decided my layout I was able to stamp my set and leave it to dry.
  • I found a fall themed paper and cut it to 4 1/4" x 5 1/2".
  • I water painted the stamps using Tim Holtz Distress Markers. I used the following colors to paint the woman and background.:
The Skirt: Faded Jeans
The Jacket: Tea Dye and Gathered Twigs
The Blouse: Weathered Wood
The Skin: Dried Marigold
The Finger Nails, Watch, Bracelet and Buttons: Barn Door
The Book: Hickory Smoke and Pumice Stone
The Hair: Mustard seed, Scattered Straw,Vintage Photo with a touch of black
The Background and sentiment: Antique Linen


  • After everything was dry I took a fine tip pen and wrote "Recipe" on the binder of the book. 
  • I stamped my sentiment onto the card front.
  • The water color paper was adhered to the background.
  • The "Happy Thanksgiving" sentiment was first distressed with Antique Linen Distress Ink. I cut a piece of the background thinner than the sentiment piece and adhered it to the back .
  • I felt like the card needed dimension so I used foam tape to adhere it to the card front.
  • I added some Jems and brad before I adhered it to the card front. 
  • All that was left was a Mafia bow and the card was finished.
It was so rewarding to watch my sister-in-laws face brighten when she opened the card. Spending time with the Family and seeing everyone SO happy was amazing! The sense of peace in this world of chaos was overwhelming. This will give me the ability to tackle anything for another year. I hope that this finds everyone well. Take time to appreciate the people in your lives and the good fortune you all have experienced this last year. Please leave your questions and comments in the box below. I read and appreciate each and everyone. Peace be with you all. Have a blessed week! Jules

Wednesday, November 25, 2015

Heard it Through the Grapevine

Hi Everyone! I can't believe tomorrow is Thanksgiving already. Where has the time gone? Are you ready for all the festivities? I know I'm not quite ready. We did the last minute grocery shopping this afternoon. My very Best friend's Birthday is Saturday and I just now finished her card. I thought I would share it with you. I used a masking technique on the card for today. Here's the card.


This card is being entered in the ATSM Make Your Mark Challenge #172
http://addictedtostamps-challenge.blogspot.de/2015/11/challenge-172-make-your-mark-winners.html

  • I used the Aged to Perfection Stamp Set by Fiskars. I found this set at Joann Fabrics,
  • I used water color paper cut to 4" x 5 1/4" to do my stamping and water coloring.
  • I cut a piece of burgundy card stock and adhered it to my A2 card front (4 1/4" x 5 1/2")
  • I had to play with my layout design for a bit in order to decide what I needed to make masks for.
  • When it was time to start my stamping I stamped the cutting board, the cheese and the grape leaf on a piece of white scrap paper. These will be the masks that I will use so I fussy cut the pieces.
  • In order to make the board appear under the cheese I had to stamp the cheese and the grape leaf first. I then placed the pieces I cut out over both Items and then I stamped the board.
  • After the board was stamped I placed the mask piece over it and stamped the wine glass.
  • Once all the stamping was completed I removed the mask pieces and started my water coloring.
  • I added color to the lettering of the sentiment so it blended in a bit and added some clear Jems to the card front.
The masking technique is actually pretty easy to do. I was pleasantly surprised. I hope this gives you some different ideas for some of the projects you have coming up. If you have any questions please feel free to ask. Just leave them in the comment box below. I am more than happy to help. I read all the comments you leave and appreciate them so much, so don't forget to leave me your comments before you go. I hope that you have a great Thanksgiving!

Tuesday, November 24, 2015

You Make Me Smile...DT

Hello visitors, followers, Bloggers, Family and Friends. I am so grateful for each and everyone of you! I want to take this time to let you know that I appreciate each and everyone of you. This Thanksgiving I will spend the day thinking about all of you and how fortunate to have you all in my life. I took some time today to make a card for a friend. It's a card meant to let her know that she was on my mind today and I just want to say Hi. I found this adorable stamp set on the Hallmark.com web sight and couldn't resist it. I am sure you will like it, too!


I am using this card for the ATSM card Challenge and DT call #171
http://addictedtostamps-challenge.blogspot.de/2015/11/challenge-171-anything-goes-winners.html


  • I started with a piece of white card stock 4" x 5 1/4" and a Darice embossing folder.
  • First I swiped the Stormy Sky Tim Holtz Distress ink on the flat side of the embossing folder. Then I placed the card stock into the folder and ran it through my Big Kick.
  • After it dried I adhered it to the front of an A2 (4 1/4" x 5 1/2") card.
  • I stamped the images from the Pick of the Liter Stamp Set by WPLUS9 Stamp Company onto water color paper.
  • I used Prisma Water Color pencils to watercolor the images. 
  • I used Tumbled Glass and Peeled Paint Distress Ink to water color the background of the images. 
  • Once the images were dry I used a Sizzix Regal Label Die to cut out the little girl image and a Simon Says Tag Die to cut out the Kittens.
  • The sentiment is from the Art-c Thinking of You Stamp Set. I used Tumbled glass distress ink to water color around the sentiment and then adhered it to the front of the card
  • All I had left to do was add the pearl accents and make the bow.
Please remember to leave me an y comments or questions you may have today. Make subscripe so you never miss any of my posts. I look forward to seeing you again. Thank you for stopping by and checking out my tutorial today. Have a blessed week!


Happy Holidayth DT

Hi, How is everyone doing? I have a fun Christmas card in two colors for today. I came across this stamp set when I was shopping at Joann Fabrics. It's so cute I had to buy it and do a card right away. I get so excited when I come across something that gets me inspired. I will even wake in the middle of the night with an idea. Do you ever have them happen to you? Its so funny because I find that I won't remember the ideas in the morning....Well, here's my card. I hope you enjoy it.


This is being entered in:
ATSM Challenge and DT Call #171
http://addictedtostamps-challenge.blogspot.de/2015/11/challenge-171-anything-goes-winners.html
 Outlawz Twisted Monday Challenge GCC112315
http://outlawzchallenges.ning.com/group/monday-greetings/forum/topics/monday-greetings-challenge-christmas-in-2-colours-gcc112315

  • I started with a Piece of red and white striped paper cut to 5" x 7" and adhered it to the front of my card.
  • I then adhered white card stock cut to 4 1/2" x 6 1/2" to the center of the front of the card.
  • Then I cut red card stock to 4 1/4" x 6 1/4" and adhered that to the center of the card front.
  • The stamp set is Santa's Workshop L-1266 from The Rubber Cafe. I stamped it onto water color paper with black dye ink.
  • I used Time Holtz Distress Markers to do the water coloring.
  • After the water coloring was dry I cut the piece to 4" x 6" and adhered it to the center of the card.
  • The Sentiment came with the set. After the ink dried I traced it with a Barn Door Distress Marker.
What a quick and easy card with great results. This stamp set is so much fun! There are other pieces included that I will use for a future card. I will be able to use this set for years to come. I Thank you for stopping by and checking out my blog. I appreciate each and everyone of you. Please make sure to subscribe to my blog so you don't miss any of my posts. I read each and every comment and enjoy them very much so please remember to leave a comment in the box below. I hope you have a great day!


Monday, November 23, 2015

Thinking of You.....DT


Thank you for stopping by and visiting my Blog today. I truly appreciate each and everyone of you and love reading all your comments. Today I made a Sympothy Card for a my son. My ex-Father-in-law recently passed away and my son was very close to him. It's hard to see your own Children in some much pain. I'm hopping the card will remind him that I'm here if he needs me. Cards just have a way of reaching out and touch someone's heart. The card lets a person know they are important to you and that you are always there whenever they need you. Thar's why I love sending cards to just say "Hi, I was thinking of you today." Here is the card. I hope you enjoy the tutorial.

I will be using this card in the ATSM Challenge #171
http://addictedtostamps-challenge.blogspot.de/


  • I started with white card stock cut to 4" x 5 1/4" and ran it through my Big Kick with an embossing folder.
  • I then used an oval Die from Sizzix to cut the sentiment label. I used Sky Blue Pwderpuff Chalk Ink around the edge of the label.
  • The sentiment is from the Hero Arts Thinking of You Clear Stamp Set and I used black ink. 
  • I used theses colors from Powder Puff Chalk Ink to color the leaves and things:
Fuchsia
Evergreen
Seafoam 
Sky Blue
Warm Sand
Buttercup

  • I cut orange card stock 4 1/4" x 5 1/2" and glued that to the front of the card.
  • Then I centered the embossed piece and adhered it onto the orange card stock.
  • I used foam tape to adhere the label to the front of the card.
I hope you enjoyed today's card. It's a quick and easy way to add your own touch to a card. I appreciate all of your comments so please remember to leave them in the comment box below. I hope This finds all of you and your family's well. Have a blessed day!


Sunday, November 22, 2015

Maple girl DT


This is Maple Girl from Unity Stamp Company.


This card is being used for a ATSM challenge #171
I used Prisma water color pencils to color her in.
Then I cut pieces of triangle shaped card stock and used Tim Holtz Distress Ink and a mini blender to do a mosaic background around her.
I stamped the sentiment worn black ink and attached the piece to a 4 1/4" x 5 1/2" card.
This was a great technique to do. It really shows her off well. This technique could be used for any type of cats and is fast and easy. Thanks for stopping by and please leave me a comment in the box below letting me know what you think.

Its a Bright Birthday DT

Hi everyone! Have you found time to craft this weekend? I have managed to do a little bit of crafting. We have a big Football game this afternoon with our rival team. We are play at home today and everyone is excited about it. Our family will be getting together this afternoon to watch it at my Sister-in-law's. Does your family get together for sport events? It's always fun to spend time with the family no matter what the reason. Today I made a Birthday card to celebrate my Granddaughters Birthday. She was born a week before Christmas and we try to make sure and make it special for her. It will be a fun celebration of life. Well, here's my card.


I will be posting this card in the Addicted to Stamps and More Challenge #171
http://addictedtostamps-challenge.blogspot.de/2015/11/challenge-171-anything-goes-winners.html


  • I started this card with a 4 1/4" x 5 1/2" piece of water color paper. 
  • I used removable glue dots to adhere the paper to my work surface. 
  • I wet the entire paper with  water. I used a wide water color brush.
  • To do the background I used Salty Ocean, Festive Berries, Mustard Seed, and Peeled Paint Tim Holtz Distress Ink.
  • I dabbed the ink onto my mat and with a damp brush I picked up the colors and brushed it across the paper.
  • I picked the paper up and tipped it around so the colors would run together and then I sprinkled table salt onto the entire paper.
  • After the paper dried I ran the paper with the word Happy Die through my Big Kick. I also used the Happy Die in a coordinating green card stock.
  • I adhered my background onto the card and placed the green Happy into the cut out and then placed all the cutout pieces from the background back into the loops of the word.
  • I used a Label Die from Sizzix with a pink card stock and placed it onto the background with foam dots. 
  • The Birthday sentiment is stamped on a small piece of velum and adhered with a dot of glue under the heart and flower.
  • I scattered flowers, a butterfly and things around the card to finish it off.
The water color technique I did on the background is versatile and very pretty when its done. The salt mixes in and leaves a unique effect on the background. I encourage you to try this technique. Its fun to see the inks, water and salt work together. Please remember to leave a comment in the box below. I read everyone of them and cherish them so much. Thank you for stopping by and please feel free to subscribe. have a great day everyone!


Saturday, November 21, 2015

A Bird and the Branch DT

Welcome Everyone. I'm so glad that you had time to stop by. Wow, the Holiday season and everything that comes with it is in full swing. Have you been busier than usual? This weekend seems to be busier for us. I've been in the craft room as much as I can so I can finish up on my Holiday cards for my Family and Friends. Are your cards finished? With Thanksgiving coming this week and the Black Friday shopping it will only get more and more festive around our house. I made a card today that Really speaks so self confidence and trust in your own instincts. Its something a lot of us need help with. Having confidence in yourself is never easy. We tend to worry about what others think and move our lives in a direction that makes others happy. This Holiday season I hope you all take time for yourself and trust your own instincts. Here is my card for today.


I will be posting this card in the:

Twisted Thursday Challenge http://outlawzchallenges.ning.com/group/prismaandothermediums/forum/topics/twisted-thursday-challenge-for-november-192-25-optional-twist 

Addicted to Stamps and More Challenge http://addictedtostamps-challenge.blogspot.de/2015/11/challenge-171-anything-goes-winners.html
  • The card is a 5" x 7" and I cut black card stock and adhered it to the front of the card.
  • I used a TCW 6 x 6 Stencil and Tim Holtz Distress Ink pads to make the sun, trees and grassy area. Once it was dry I cut it to 4 3/4" wide and then cut it in half so each piece was 2 1/2" long.
  • I glued two pieces on to the card front.
  • The water coloring is Own Wings by Unity Stamp Company Stamp. I used my Tim Holtz Distress Markers and a T-prime water brush to paint the bird.
  • After she dried I cut the water color paper down and adhered her to the middle of the card. Then I stamped the sentiment and water colored a light blue background around the bird. 
  • I added sequins and ribbon to finish off the card.

This card was fun to paint. I love water coloring. The Bird and her little scarf makes me chuckle. It gets pretty cold in Minnesota and the birds here need a hat and scarf most the winter. Please remember to leave me a comment below. I truly appreciate each and everyone. If you have any questions feel free to leave them in the comment box below. I am happy to help in anyway possible. Have a blessed weekend!